

Description complète
Trigger micro switch: bring the click back to L or R
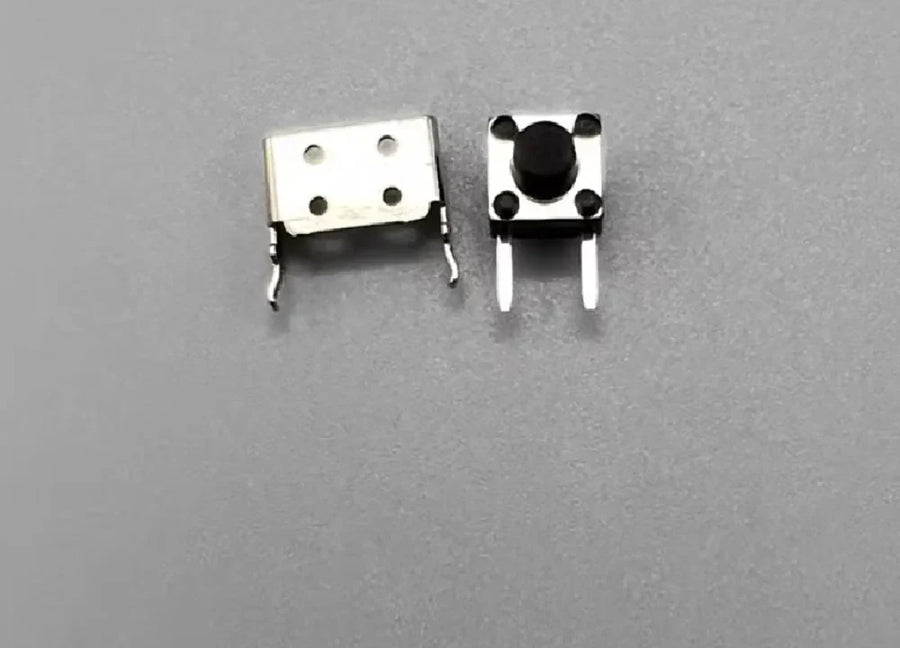
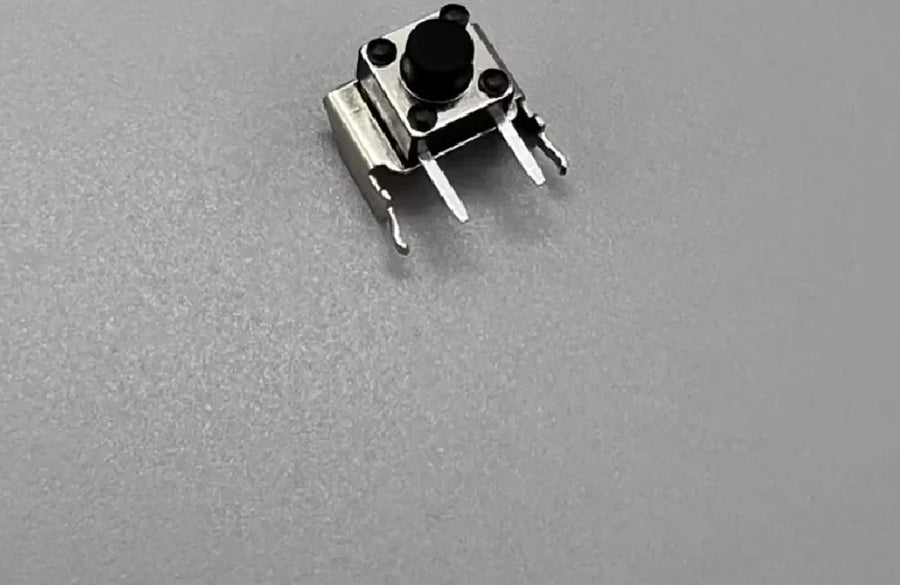
On a Game Boy Advance or a Game Boy Advance SP, the part of the trigger that gives out first is almost always the same: the small micro switch soldered onto the motherboard. The button presses into nothing, or you have to press three times before the game responds. This spare part replaces that switch, individually, on the side that is causing trouble.
What it does
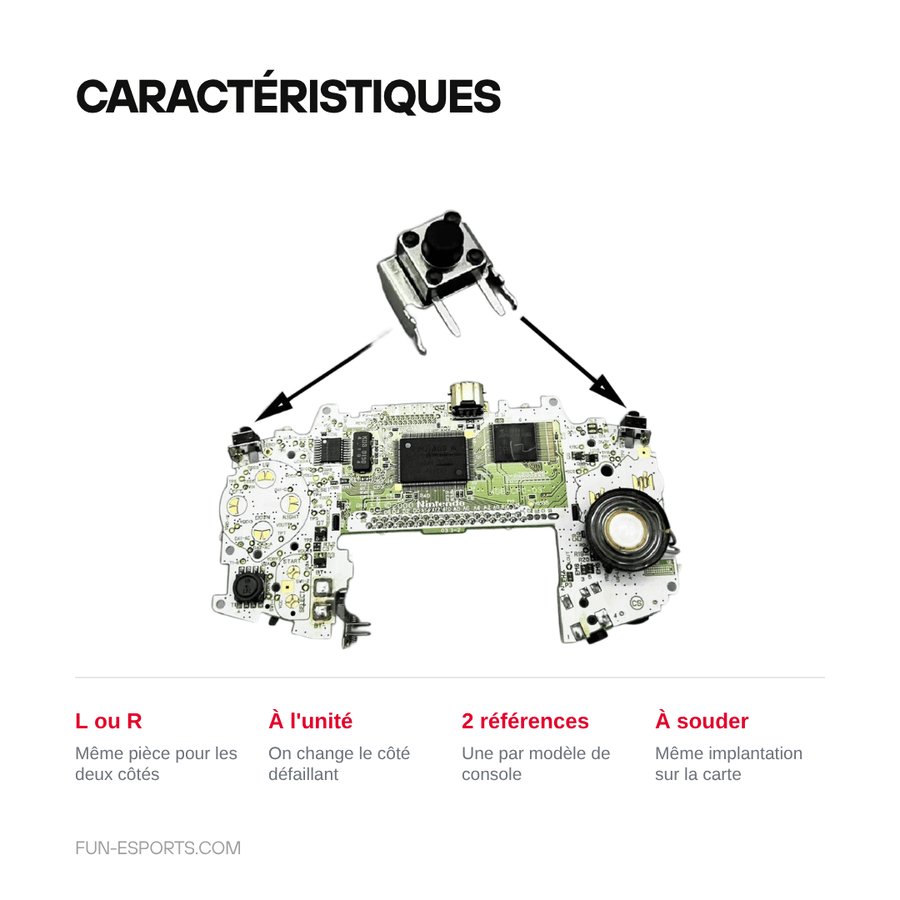
- Replaces the original switch: same footprint, same position on the motherboard, the shell's plastic button sits right over it again.
- Sold individually: you only change the faulty side, left or right, without taking apart the rest.
- Two versions to choose from: one version for the Game Boy Advance, one for the Game Boy Advance SP — the two motherboards do not use the same model.
What it doesn't do
- Cannot be installed without a soldering iron: you need to desolder the old switch and then solder in the new one. It is not a clip-in part.
- Does not repair the shell's plastic button, a broken spring or a torn-off circuit trace — if the fault lies there, replacing the switch will not change anything.
- The supplier's listing claims compatibility with the Game Boy Color, DS, 3DS and Switch: this is wrong, and we do not repeat it. We only guarantee the Game Boy Advance and the Game Boy Advance SP.
- Supplied without instructions, tools or solder.
Compatibility
Game Boy Advance (AGB-001) with the "GBA" version, Game Boy Advance SP (AGS-001 and AGS-101) with the "GBA SP" version. Choose the variant that matches your console: the two switches are not interchangeable. Not suitable for the Game Boy Micro, the Game Boy Color, or the Nintendo DS, 3DS or Switch consoles.
Skill level required
Intermediate-level repair. You need to open the console (Y00 tri-wing screwdriver for the Game Boy Advance, tri-wing plus Phillips for the SP), remove the motherboard, then desolder and resolder the switch. Have a fine-tip iron, desoldering braid and solder ready. If you have no experience soldering on a motherboard, have the repair done for you.
In the box
- 1 trigger micro switch, for the L side or the R side (order two to replace both triggers).
Read before ordering: Retro Peripherals
Delivery in 10 to 18 days · ships within 3 to 5 days · 2-year legal guarantee · 14-day returns.
L or R Trigger Micro Switch for Game Boy Advance and SP
Solder-in micro switch for the L or R trigger of a Game Boy Advance or a Game Boy Advance SP.
En stock
📦Ships within 3 to 5 business days · Delivery in 10 to 18 business days · 2-year legal guarantee · 14-day returns.
ℹÀ partir de 150 €, la livraison s’effectue en Point Relais.
- 🇫🇷SAV français
réponse sous 1 jour ouvré - 🛡Garantie légale
2 ans - ↩14 jours
pour changer d’avis - 🔒Paiement sécurisé
CB · PayPal · Klarna
A trigger that no longer responds
On a twenty-year-old Game Boy Advance, the trigger loses its click long before the screen or the battery. You press, nothing happens, or you have to press twice to brake in a racing game. Nine times out of ten, the shell and the button are intact: it is the micro switch soldered underneath that is worn out. Replacing it gives the console a crisp trigger again, with the same tactile feedback as the original.
A switch, not a kit
This is a bare part, sold individually, in the version that matches your motherboard: one Game Boy Advance version, one Game Boy Advance SP version. The two are not interchangeable, hence the choice to make when ordering. You only replace the faulty side, which saves you from desoldering a trigger that still works. To fix both L and R, order two.
What we tell you before you buy
This part requires a soldering iron: desolder the old switch, clean the pads, fit the new one. If your plastic button is broken or a circuit trace is torn off, this is not the part you need. Listing verified on 19 August 2026: we have kept only the compatibilities we can stand behind, and discarded the supplier's far-fetched list. French customer service, reply within 1 business day.
What this accessory brings
Verified manufacturer specifications · vérifié le
Ce qu’il fait bien
- Replaces the original trigger switch, same position on the motherboard
- Sold individually: you only change the faulty side
- Two versions to choose from, Game Boy Advance or Game Boy Advance SP
- Same part for the left trigger and the right trigger
Ce qu’il ne fait pas
- Soldering required: desoldering then soldering on the motherboard
- Does not repair the shell's plastic button or a torn-off circuit trace
- Not suitable for Game Boy Color, Game Boy Micro, DS, 3DS or Switch, contrary to the supplier's claims
- Supplied without instructions, tools or solder
Voir toute la fiche technique+
Matière et format
- Type d’accessoire
- Trigger micro switch
Compatible avec
- Game Boy Advance (AGB-001)
- Game Boy Advance SP (AGS-001)
- Game Boy Advance SP (AGS-101)
Dans la boîte
- 1 trigger micro switch (L side or R side)
Frequently Asked Questions
🔧 Do I need to solder to install this part?
Yes. The switch is soldered onto the motherboard: you need to desolder the old one, clean the pads and solder in the new one. A fine-tip iron, desoldering braid and solder are enough, but the job requires experience.
🎮 Which consoles is it compatible with?
Game Boy Advance (AGB-001) for the "GBA" version, Game Boy Advance SP (AGS-001 and AGS-101) for the "GBA SP" version. Despite what the supplier's listing claims, this switch is not suitable for the Game Boy Color, the Game Boy Micro, or the DS, 3DS or Switch consoles.
↔️ Is it the same part for L and R?
Yes, the switch is the same on both sides of a given console. However, it differs between the Game Boy Advance and the Game Boy Advance SP: choose the variant that matches your machine.
📦 What's in the box?
1 trigger micro switch. It is a bare part, without instructions, solder or tools. To replace both triggers, order two.
🧰 What tools do I need?
A Y00 tri-wing screwdriver to open the console (plus a Phillips screwdriver on the SP), an opening spudger, a fine-tip soldering iron, desoldering braid and solder.
⏱️ How long does the replacement take?
Allow 30 to 45 minutes in total: opening, removing the motherboard, desoldering, soldering and reassembly. The longest part is the disassembly, not the soldering itself.
🚚 What are the delivery times?
Delivery in 10 to 18 days, ships within 3 to 5 days.
🛡️ Which guarantee applies?
2-year legal guarantee of conformity. 14-day returns. French customer service, reply within 1 business day.
Why buy here rather than on a marketplace
It is a fair question. Here is the answer, straight.
Every listing is checked before publication: real compatibility, material, dimensions, box contents. Many models never make it into the catalogue.
A question about compatibility, a fit problem, a return: you write, a human replies within 1 business day. In French.
The 2-year legal warranty of conformity is handled by us — not by a form on the other side of the world. And 14 days to change your mind, with no need to justify yourself.
We do not claim to be the cheapest. We claim that you will know exactly what you are buying before you pay.
Read this before choosing
Our guides to accessories: compatibility, protection, transport.

Pixel art: create your own designs for a Divoom display
Grid size, number of colours, outlines, animation: the guide to getting started in pixel art and displaying your own creations on a Divoom display.
2 min de lecture · publié le

Divoom pixel art speakers: which one should you choose?
Astrotoo, Ditoo-Pro, FlowToo, Tiivoo-2, Timebox-Evo, MiniToo, Fairy-OK: the seven Divoom speakers compared, by use and budget.
2 min de lecture · publié le

Times Frame or Times Frame Pure: which Divoom floating photo frame should you choose?
64 or 32 GB, three colours or just one, a dial or not: the real differences between the Times Frame and Times Frame Pure…
1 min de lecture · publié le